Sensor Snippets
Copy-paste Arduino/ESP32 code for common sensors used in rapid prototyping. Each snippet is a minimal working example — wire it up, upload it, and build from there. Drop a photo or GIF into images/snippets/ with the filename shown under each snippet to show what it looks like in action.
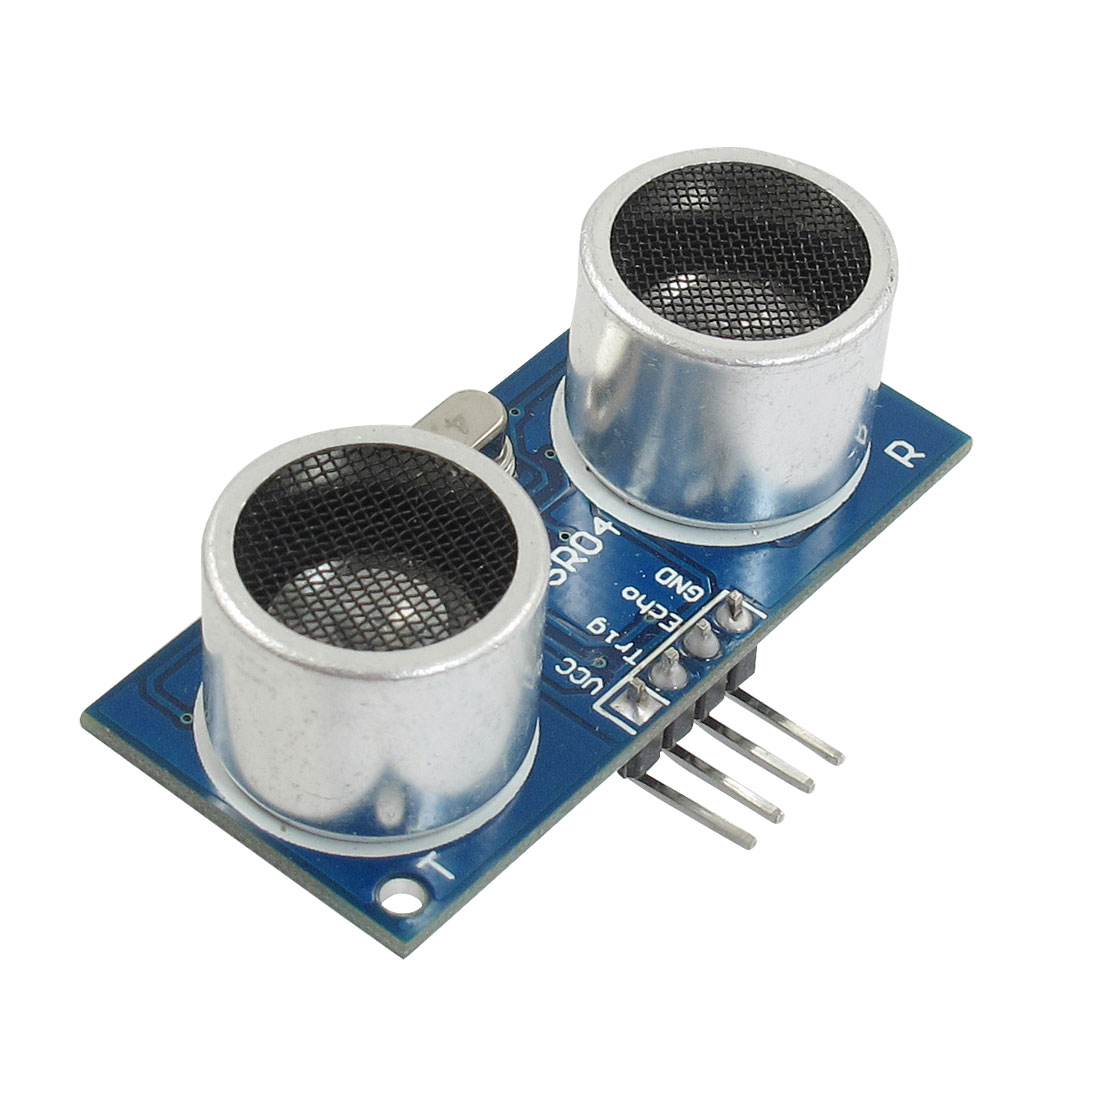
HC-SR04 — Ultrasonic Distance Sensor
Reads distance in centimeters using the trigger/echo pins. Great for proximity-based interaction.
images/HCSR04.jpegconst int trigPin = 9;
const int echoPin = 10;
void setup() {
Serial.begin(9600);
pinMode(trigPin, OUTPUT);
pinMode(echoPin, INPUT);
}
void loop() {
digitalWrite(trigPin, LOW);
delayMicroseconds(2);
digitalWrite(trigPin, HIGH);
delayMicroseconds(10);
digitalWrite(trigPin, LOW);
long duration = pulseIn(echoPin, HIGH);
float distanceCm = duration * 0.0343 / 2;
Serial.print("Distance: ");
Serial.print(distanceCm);
Serial.println(" cm");
delay(200);
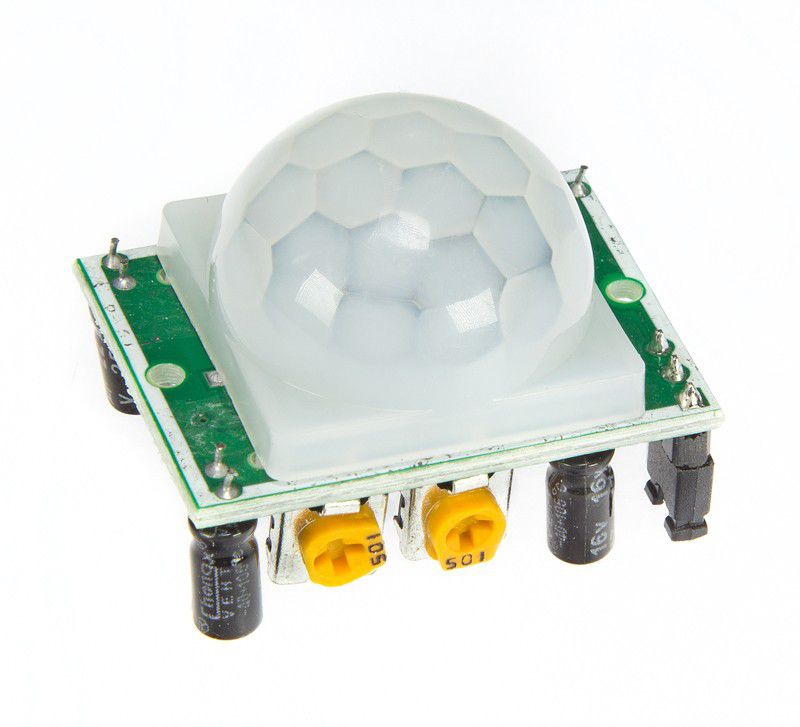
}PIR Motion Sensor (HC-SR501)
Digital HIGH/LOW output when motion is detected. Good starting point for presence-triggered installations.
images/Pir-sensor.jpgconst int pirPin = 2;
void setup() {
Serial.begin(9600);
pinMode(pirPin, INPUT);
}
void loop() {
int motion = digitalRead(pirPin);
if (motion == HIGH) {
Serial.println("Motion detected!");
} else {
Serial.println("No motion");
}
delay(150);
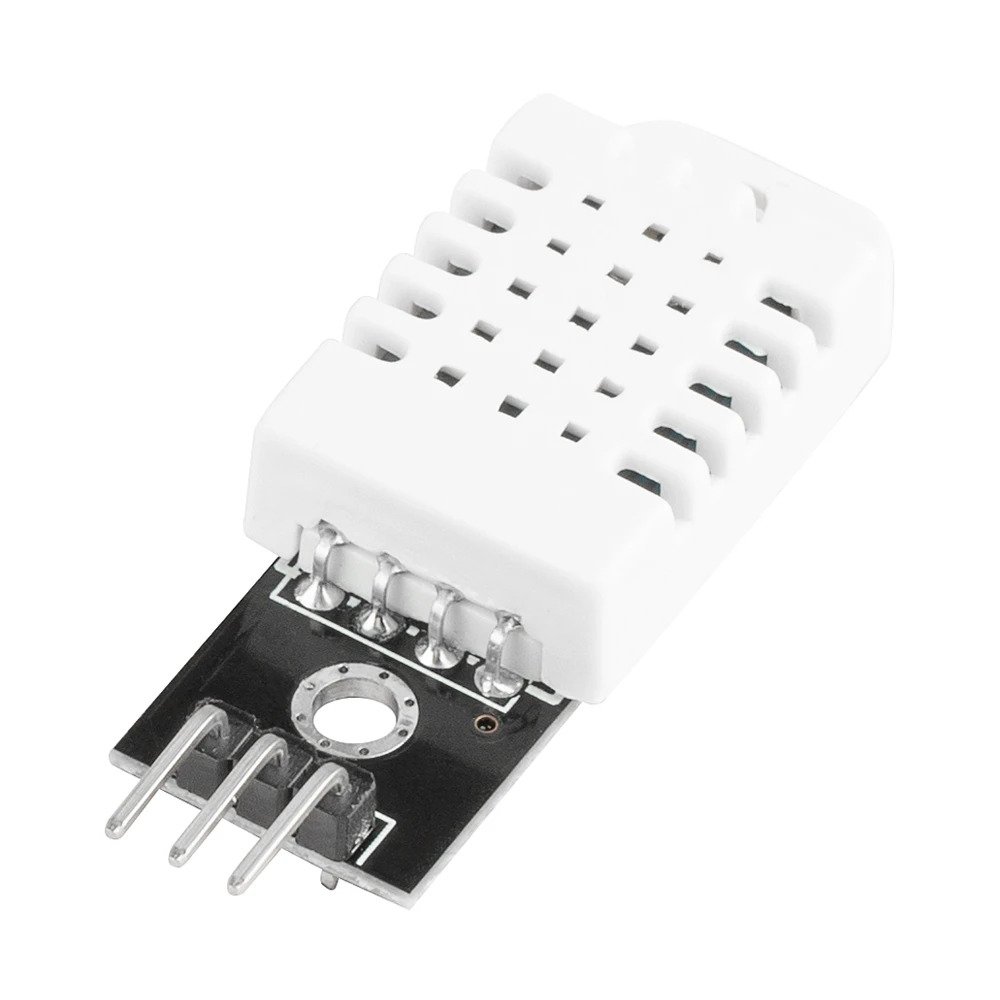
}DHT22 — Temperature & Humidity
Requires the "DHT sensor library" by Adafruit (install via Library Manager). Reads both temperature (°C) and relative humidity.
images/DHT-22-sensor.jpg#include <DHT.h>
#define DHTPIN 4
#define DHTTYPE DHT22
DHT dht(DHTPIN, DHTTYPE);
void setup() {
Serial.begin(9600);
dht.begin();
}
void loop() {
float humidity = dht.readHumidity();
float tempC = dht.readTemperature();
if (isnan(humidity) || isnan(tempC)) {
Serial.println("Failed to read from DHT sensor");
return;
}
Serial.print("Temp: ");
Serial.print(tempC);
Serial.print(" C Humidity: ");
Serial.print(humidity);
Serial.println(" %");
delay(2000);
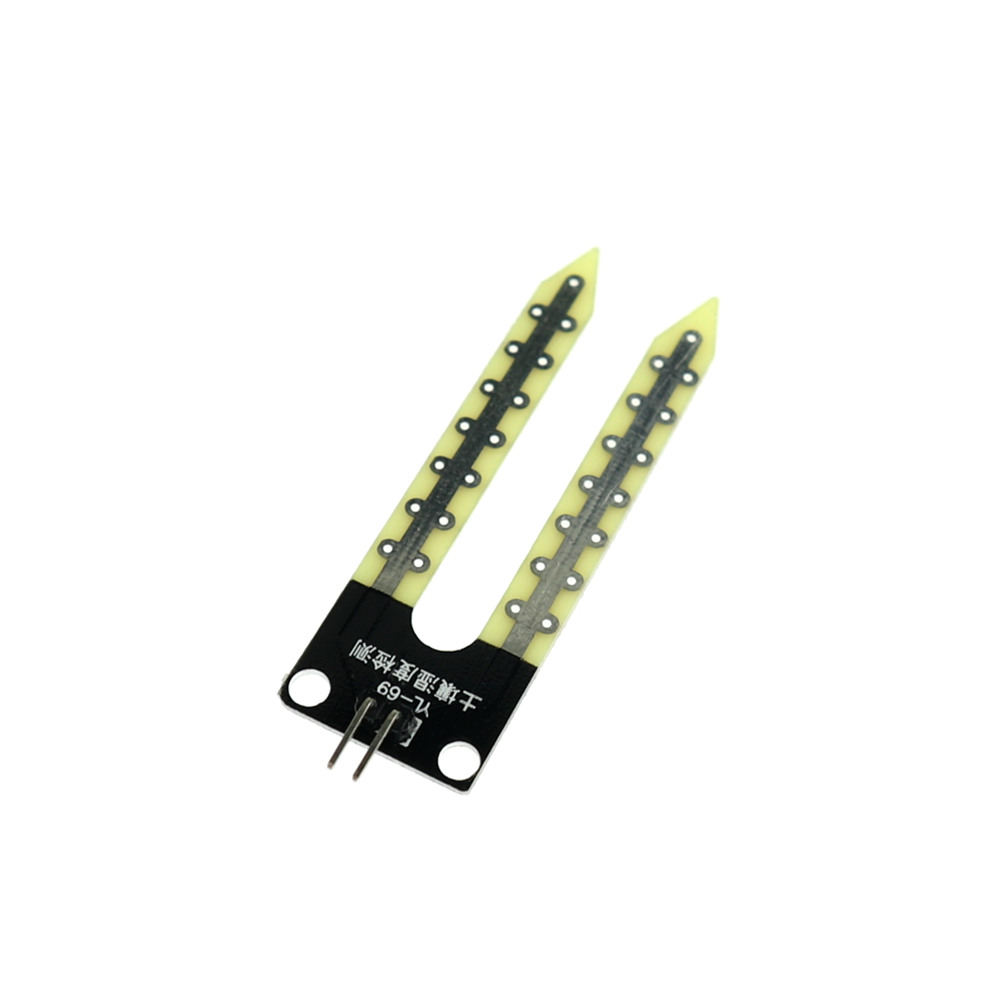
}Soil Moisture Sensor — Two-Prong (YL-69 / FC-28)
The cheap two-fork sensor you stick straight into soil. Reads a raw analog value that goes down as the soil gets wetter, and converts it to a 0–100% reading. Wire the AO pin to an analog pin, VCC to 5V, GND to GND.
images/Soil-moisture-sensor.jpgconst int soilPin = A0;
// Calibrate these for your own sensor + soil:
// dip the probe in dry air and note the value, then in water and note that one.
const int dryValue = 850; // raw reading in dry soil / air
const int wetValue = 350; // raw reading in water / fully wet soil
void setup() {
Serial.begin(9600);
}
void loop() {
int raw = analogRead(soilPin);
int moisturePercent = map(raw, dryValue, wetValue, 0, 100);
moisturePercent = constrain(moisturePercent, 0, 100);
Serial.print("Raw: ");
Serial.print(raw);
Serial.print(" Moisture: ");
Serial.print(moisturePercent);
Serial.println(" %");
delay(500);
}Potentiometer — Analog Read
Reads a 0–1023 value and maps it to a usable range. Useful for dials, sliders, and manual control inputs.
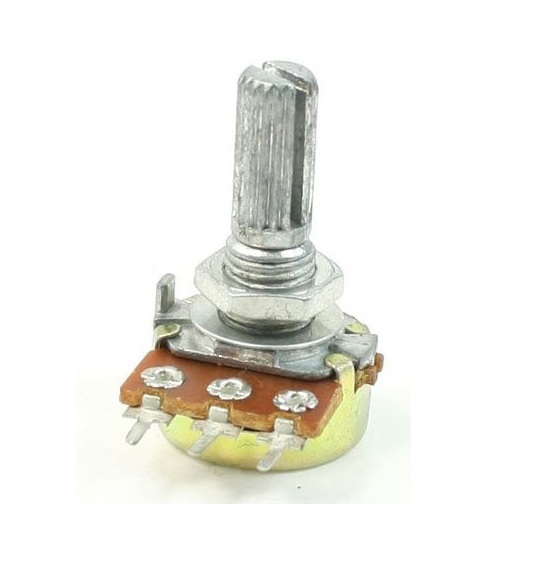
images/Potentiometer.jpgconst int potPin = A0;
void setup() {
Serial.begin(9600);
}
void loop() {
int raw = analogRead(potPin);
int mapped = map(raw, 0, 1023, 0, 255);
Serial.print("Raw: ");
Serial.print(raw);
Serial.print(" Mapped: ");
Serial.println(mapped);
delay(100);
}Servo Motor — Sweep
Basic servo sweep using the built-in Servo library. A good base for kinetic mechanisms.

images/snippets/servo.jpeg#include <Servo.h>
Servo myServo;
void setup() {
myServo.attach(9);
}
void loop() {
for (int pos = 0; pos <= 180; pos++) {
myServo.write(pos);
delay(10);
}
for (int pos = 180; pos >= 0; pos--) {
myServo.write(pos);
delay(10);
}
}ESP32 — Connect to WiFi
Minimal boilerplate to get an ESP32 on your network — the first step for anything web-connected.

images/snippets/esp32-wifi.gif#include <WiFi.h>
const char* ssid = "your-network";
const char* password = "your-password";
void setup() {
Serial.begin(115200);
WiFi.begin(ssid, password);
while (WiFi.status() != WL_CONNECTED) {
delay(500);
Serial.print(".");
}
Serial.println("");
Serial.print("Connected. IP address: ");
Serial.println(WiFi.localIP());
}
void loop() {
}NeoPixel — Cycle Colors with a For Loop
Uses the Adafruit NeoPixel library (install "Adafruit NeoPixel" via Library Manager). A small helper function fills every pixel with one color at a time — call it with different red/green/blue values to cycle colors, no arrays or fancy types needed.

images/snippets/neopixel-forloop.gif#include <Adafruit_NeoPixel.h>
#define PIN 6
#define NUMPIXELS 8
Adafruit_NeoPixel strip(NUMPIXELS, PIN, NEO_GRB + NEO_KHZ800);
void setup() {
strip.begin();
strip.show(); // turn all pixels off
}
void loop() {
setAllPixels(255, 0, 0); // red
delay(500);
setAllPixels(0, 255, 0); // green
delay(500);
setAllPixels(0, 0, 255); // blue
delay(500);
setAllPixels(255, 255, 0); // yellow
delay(500);
}
// Sets every pixel on the strip to the same color
void setAllPixels(int red, int green, int blue) {
for (int i = 0; i < NUMPIXELS; i++) {
strip.setPixelColor(i, strip.Color(red, green, blue));
}
strip.show();
}NeoPixel — Hardcoded Per-Pixel Colors
Sets each LED to its own fixed color, one line per pixel. Useful when you want a specific, unchanging pattern rather than something generated in code.

images/snippets/neopixel-hardcoded.gif#include <Adafruit_NeoPixel.h>
#define PIN 6
#define NUMPIXELS 8
Adafruit_NeoPixel strip(NUMPIXELS, PIN, NEO_GRB + NEO_KHZ800);
void setup() {
strip.begin();
strip.setPixelColor(0, strip.Color(255, 0, 0));
strip.setPixelColor(1, strip.Color(0, 255, 0));
strip.setPixelColor(2, strip.Color(0, 0, 255));
strip.setPixelColor(3, strip.Color(255, 255, 0));
strip.setPixelColor(4, strip.Color(255, 0, 255));
strip.setPixelColor(5, strip.Color(0, 255, 255));
strip.setPixelColor(6, strip.Color(255, 255, 255));
strip.setPixelColor(7, strip.Color(255, 128, 0));
strip.show();
}
void loop() {
// colors are set once in setup() and just stay lit
}NeoPixel — Chase Animation
A single lit pixel runs down the strip and loops back to the start — the classic "Cylon"/chase effect. Swap the color or add a second pixel offset in the loop for variations.

images/snippets/neopixel-chase.gif#include <Adafruit_NeoPixel.h>
#define PIN 6
#define NUMPIXELS 8
Adafruit_NeoPixel strip(NUMPIXELS, PIN, NEO_GRB + NEO_KHZ800);
void setup() {
strip.begin();
strip.show();
}
void loop() {
for (int i = 0; i < NUMPIXELS; i++) {
strip.clear();
strip.setPixelColor(i, strip.Color(0, 150, 255));
strip.show();
delay(80);
}
}